Difference between revisions of "W5020 CS Ed Week 2020"
SheLikesPigs (talk | contribs) (→CSS) |
Jeff-strong (talk | contribs) m (Editorial review and minor corrections) |
||
| (92 intermediate revisions by 11 users not shown) | |||
| Line 1: | Line 1: | ||
Future updates will be provided through the Remind class @ahs-csed. | |||
=== CS ED Week === | |||
[[File:Banner.png|frameless|800px|Image: 800px]] | |||
'''<big>If you would like to participate in the event, please sign up by [https://docs.google.com/forms/d/e/1FAIpQLScyx0dsKmb53X6WCXeMNaISDzvVfIpH6u-pvJluvF_ZEke9Ew/viewform?usp=sf_link Clicking Here] | |||
''' | |||
Future updates will be provided through the Remind class '''@ahs-csed'''. | |||
We thank you for your interest in participating! | We thank you for your interest in participating! | ||
== | == Introduction == | ||
<big>An Hour of Code and Beyond</big> | <big>An Hour of Code and Beyond</big> | ||
''= | ''<span style="font-variant:small-caps">"There's more to it than meets the eye"</span>'' | ||
{{MerlinNoteFromEditor|The date and times below are from 2020, but should they be changed to be current?}} | |||
<blockquote> | |||
'''Wednesday, December 9th, 2020 5PM-7PM''' | '''Wednesday, December 9th, 2020 5PM-7PM''' | ||
</blockquote> | |||
[https://allenisd.zoom.us/j/88246450907?pwd=MVJObDdKOGVWNExkOXRCR0tjVUVmZz09 Zoom Link] | |||
[[File:CS ED WEEK LOGO.png|thumb|[https://www.csedweek.org Ed Week 2020]]] | [[File:CS ED WEEK LOGO.png|thumb|[https://www.csedweek.org Ed Week 2020]]] | ||
'''What is CS ED Week about | '''What is CS ED Week about?''' <br> | ||
“Computer Science Education Week (CSEdWeek) is an annual call to action to inspire K-12 students to learn computer science, advocate for equity in computer science education, and celebrate the contributions of students, teachers, and partners to the field. As part of the #CSforGood movement this year we’re proud to | “Computer Science Education Week (CSEdWeek) is an annual call to action to inspire K-12 students to learn computer science, advocate for equity in computer science education, and celebrate the contributions of students, teachers, and partners to the field. As part of the #CSforGood movement this year we’re proud to elevate.” | ||
'''Topics we will go over:''' | '''Topics we will go over:''' | ||
* Computer | * What is Computer Science? | ||
* Linux Basics | * Linux Basics | ||
* Shell basics | * Shell basics | ||
| Line 27: | Line 37: | ||
'''Merlin Shell Access Application:''' | '''Merlin Shell Access Application:''' | ||
If you do not have access to the Merlin Shell, use this Link to sign up. You will need this access to the shell to participate in the events today! | |||
[[File:Merlin shell access.png|Merlin shell access application QR Code]] | [[File:Merlin shell access.png|Merlin shell access application QR Code]] | ||
'''CS ED Survey''' | ''[https://www.codermerlin.com/wiki/index.php/Merlin_Shell_Access_Application Merlin Shell Access Application Link]'' | ||
'''CS ED Survey:''' | |||
If you already completed the application above, fill this survey so we can see what interests you! | If you already completed the application above, fill this survey so we can see what interests you! | ||
''[https://docs.google.com/forms/d/e/1FAIpQLScyx0dsKmb53X6WCXeMNaISDzvVfIpH6u-pvJluvF_ZEke9Ew/viewform?embedded=true Survey Link]'' | |||
== Computer Science == | == Computer Science == | ||
[[File:CodeBackground.jpg|thumb]] | |||
==== Why Computer Science? ==== | |||
Computer science is one of the fastest growing pathways in terms of | Computer science is one of the fastest growing pathways in terms of economic viability and accessibility and significance. With the onset of the digital age, many industries have turned toward technology as their ticket to the future, and now, more than ever, need computer scientists in their fields. Just take a look at the world around us. Restaurants and grocery chains such as Walmart or Chili’s rely on mobile applications for deliveries and purchases, while distributors like Amazon continue to thrive in online shopping. Anything your eyes meet is bound to have coding behind its inception. Yet, this flexibility exists within the work environment as well. Unlike other trades or positions, computer science requires no specific job site to get work done. Whether it be from your couch or even your local library, progress can be made, as long as an electrical charge and Internet connection exist. However, while this ease of access can be applied to both contingency and setting, it is mostly absent from the field’s workforce. | ||
Starting a career in computer science is arguably the hardest part; someone needs to make an initial investment for equipment, and they need the courage to dive head-first into uncharted territory. The price floor itself is a considerable first step because it requires a functioning computer plus electrical and network connections. This places those of lower economic standings at a disadvantage because the tools required often don't match a preferable price point. Yet, while cost filters out and blocks access to those interested in the field, social diversity actively works to obstruct those of differing social status as well. The current environment of computer science suffers from a social rigidity: variety in its workers' social heritage is something not commonly seen, and, as a result, intimidates newcomers entering the industry. People typically search for those who are like them, such as in high school clubs or friend groups. Yet, because these values are almost nonexistent, plenty of outsiders are turned away. However, with newcomers like you, we hope that the field can be more accepting and open. Like with any common settler, we need rookies like you to set up camp in the field and carve your own space that can change what was once a frightening turnoff into a warm embrace. They say that metals can attract other metals, and we need you to be those magnets in the field, setting up a segway for the entrance of like-minded individuals. | |||
==== Fundamental Concepts of Computer Science ==== | ==== Fundamental Concepts of Computer Science ==== | ||
Computer Science, at its core, is | Computer Science, at its core, is the bridge between computers and humans, allowing us to “talk” to machines and tell them what to do. Coding languages are used to translate normal words into computer language. For example, 2 is a ''number'' and is represented through a variable that can store numbers and has a label to clarify exactly what information it stores. Coding languages have a few basic data types used to store common real world values: | ||
* Booleans represent whether something is true or false | * '''''Booleans''''' represent whether something is true or false | ||
* Integers represent positive and negative whole numbers | * '''''Integers''''' represent positive and negative whole numbers | ||
* Doubles represent positive and negative decimals | * '''''Doubles''''' represent positive and negative decimals | ||
* Characters represent | * '''''Characters''''' represent 'letters,' except they also include numbers, symbols, and other written characters, as long as they are only 1 unit long. <br> This means 'a' is a single character and 'an' is made up of two characters. | ||
* Strings represent words, or several characters put together | * '''''Strings''''' represent words, or several characters put together. | ||
These are the | |||
These are the five basic variable types used in coding. However, if you wanted to store the information of something more complicated than just a number or a word, like an animal, you would use a '''''class'''''. A class is a way to group together lots of smaller variables as parts of a larger object. For example, animals have legs, ages, colors, sizes, names, and other information that can be stored using any of the five basic data types. A class allows you to compile these values together under one name, in this case Animal, and also name its parts, like legs, color, weight, and species. Classes also have the ability to use '''''functions''''', which are the actions a class can perform, such as an Animal being able to eat, walk, sleep, or hunt. | |||
==== Effects of Computer Science? ==== | |||
Computer science goes beyond coding—it is a unique outlet that encourages creative expression and allows students to be free from the constraints of a typical classroom. Computer science also serves as a platform for students to be ambitious in their pursuits and broaden their knowledge in an engaging manner, but the effect of the field goes far beyond its mentally stimulating nature. | |||
Socially, programming and computer science have opened up an avenue to help empower underprivileged communities and break the cycle of poverty. The introduction of innovations—such as algorithms that better organize resource allocation, technology that helps connect communities to make existing resources more available, and artificial intelligence that can efficiently pinpoint areas that are most in need—has allowed for great strides in alleviating the effects of poverty in many communities. | |||
These innovations along with the increased capacity to increase awareness of these issues across the nation has led to increased donations and greater funding for educational programs that prepare students for success going forward. Through these improved programs, students have been met with more promising opportunities to expand on their programming skills and put themselves in positions to successfully break the cycle of poverty. | |||
On a larger scale, increased access to computer science is allowing for a mostly white & male dominated field to become more diverse and inclusive. With the expansion of curriculum to more regularly include computer science education, representation of ethnic, gender, and other minority groups has begun to trend upwards. In turn, this has led to greater representation in the workplace. These developments have had positive social effects because as high-paying and influential jobs diversify, opportunities become more available for all people regardless of their background and groups that are often overlooked can feel more empowered to pursue computer science as a career. | |||
In the end, although computer science is a field that is progressing everyday, it is still wide open for different possibilities and changes. Although great progress has been made, there is still work to be done to ensure that computer science is a field that is inclusive to absolutely everyone, regardless of their background. | |||
== Linux Basics == | == Linux Basics == | ||
| Line 59: | Line 86: | ||
==== Installing the secure shell extension ==== | ==== Installing the secure shell extension ==== | ||
To access Merlin, you'll need a secure shell client. | To access Merlin, you'll need a secure shell client. | ||
A shell allows a user to interact on one computer, and the client allows you to create a shell on another computer. | |||
If you're using a Windows-based device (usable on any device with Chrome): install Google Chrome, open up Chrome and search "Secure Shell Extension", install the extension. | If you're using a Windows-based device (usable on any device with Chrome): install Google Chrome, open up Chrome and search "Secure Shell Extension", install the extension. | ||
If you're using a Mac or Linux based device, it probably has a built-in client | [[File:Secure Shell App in Web Store.png|700px|center]] | ||
[[ | |||
If you're using a Mac or Linux based device, it probably has a built-in client that can be accessed from the terminal. You can also use telnet. (A MacOS Intel-compliled client is available [[Media:InetUtils-2.4.2-MacOS-Intel.zip|here]] or download the source from [https://ftpmirror.gnu.org/inetutils/inetutils-2.4.tar.gz here].) | |||
You will need a connection string to access the server. | You will need a connection string to access the server. | ||
==== Obtaining an account ==== | ==== Obtaining an account ==== | ||
Fill out [[Merlin_Shell_Access_Application|this]] form (if you haven't already) and wait for your credentials to be provided (via email). | Fill out '''[[Merlin_Shell_Access_Application|this]]''' form (if you haven't already) and wait for your credentials to be provided (via email). | ||
Once your account is obtained, open up the "Connection Dialogue" | Once your account is obtained, open up the '''"Connection Dialogue"''' and input the connection string. It prompts you for your password. Input it and continue. | ||
It | It prompts you to reset your password. You can do this by typing "passwd" into the terminal: | ||
{{Hint| Remember that when you enter the password, what you type '''will not be echoed to the terminal''' (you will not see the characters as you type them). | {{Hint| Remember that when you enter the password, what you type '''will not be echoed to the terminal''' (you will not see the characters as you type them). You'll just have to believe that your keypresses are being received. | ||
}} | }} | ||
| Line 90: | Line 119: | ||
=== Navigating the Shell === | === Navigating the Shell === | ||
In | In the shell, everything can be done with the keyboard. The shell works on a command response system where you type a command, and the program provides a response. The shell works with directories that are similar to folders on a typical computer, and when you run a command, it runs on the current working directory. | ||
====View the working directory==== | |||
To see what our working directory is inside the shell, we are going to use '''pwd''' which stands for "print the working directory." You can use the command by typing it in and pressing <RETURN>. | |||
{{ConsoleLine|first-last@codermerlin:~$ |pwd}} | {{ConsoleLine|first-last@codermerlin:~$ |pwd}} | ||
{{ConsoleLine|/home/first-last|}} | {{ConsoleLine|/home/first-last|}} | ||
After using the command you should see something like the above console line. As long as you haven't moved in the directory you should start off in the home directory. | After using the command, you should see something like the above console line. As long as you haven't moved in the directory, you should start off in the home directory. <br> | ||
====Listing directories and files==== | |||
Next, let's try the '''ls''' command which | Next, let's try the '''ls''' command, which '''list,''' the directories and files in the working directory. | ||
However no files or directories have been created yet, so there won't be anything to display. | However, no files or directories have been created yet, so there won't be anything to display. | ||
{{ConsoleLine|first-last@codermerlin:~$ |ls}} | {{ConsoleLine|first-last@codermerlin:~$ |ls}} <br> | ||
====Making a directory==== | |||
We can make a directory by using the command '''mkdir'''. | |||
We can make a directory by using the command '''mkdir''' | |||
{{ConsoleLine|first-last@codermerlin:~$ |mkdir firstDirectory}} | {{ConsoleLine|first-last@codermerlin:~$ |mkdir firstDirectory}} | ||
Then to enter the directory simply use the command "'''cd''' <SPACE> directoryName". | Then to enter the directory, simply use the command "'''cd''' <SPACE> directoryName". | ||
{{ConsoleLine|first-last@codermerlin:~$ |cd firstDirectory}} | {{ConsoleLine|first-last@codermerlin:~$ |cd firstDirectory}} | ||
And if we use the '''pwd''' command now, we should see that we are in the created directory. | And if we use the '''pwd''' command now, we should see that we are in the created directory. | ||
{{ConsoleLine|first-last@codermerlin:~$ |pwd}} | {{ConsoleLine|first-last@codermerlin:~$ |pwd}} | ||
{{ConsoleLine|/home/first-last/firstDirectory|}} | {{ConsoleLine|/home/first-last/firstDirectory|}} <br> | ||
====Changing directories==== | |||
Now let's navigate out of the current directory. Using the previous '''cd''' command, we can use '''"../"''' to go back one directory (which can be chained together, e.g. "../../../"), leave it blank to return to the home directory or use '''"~"''' to also get to the home directory. | |||
Now let's navigate out of the current directory. Using the previous '''cd''' command we can use '''"../"''' to go back one directory (which can be chained together, e.g. "../../../"), leave it blank to return to the home directory or use '''"~"''' to also get to the home directory. | |||
{{ConsoleLine|first-last@codermerlin:~$ |cd ../}} | {{ConsoleLine|first-last@codermerlin:~$ |cd ../}} | ||
Now that we have returned to the home directory, let's try listing again: | Now that we have returned to the home directory, let's try listing again: | ||
{{ConsoleLine|first-last@codermerlin:~$ |ls}} | {{ConsoleLine|first-last@codermerlin:~$ |ls}} | ||
You should now see the directory previously added. | You should now see the directory previously added. | ||
{{ConsoleLine|firstDirectory|}} | {{ConsoleLine|firstDirectory|}} <br> | ||
====Creating a file==== | |||
We can create a file using the '''emacs''' command followed by the file name and extension. In this case, we are using the Swift coding language so the extension is ".swift". This | We can create a file using the '''emacs''' command followed by the file name and extension. In this case, we are using the Swift coding language so the extension is ".swift". This creates and opens the file, which will initially be blank, but if the file already exists, this command can be used to open and edit it. | ||
{{ConsoleLine|first-last@codermerlin:~$ |emacs main.swift}} | {{ConsoleLine|first-last@codermerlin:~$ |emacs main.swift}} | ||
Once we have a file open, we can begin using emacs shortcuts to navigate and edit the file. However, for now, let's suspend the file using '''CONTROL-z''' (press your control key, followed by the 'z' key). <br> | |||
Once we have a file open we can begin using emacs | ====View running files==== | ||
Now we are back in the shell, but we still have a file that is open, but suspended. | |||
Now we are back in the shell, | Using the command '''jobs''', we can see all of our open files. | ||
Using the command '''jobs''' we can see all of our open files. | |||
{{ConsoleLine|first-last@codermerlin:~$ |jobs}} | {{ConsoleLine|first-last@codermerlin:~$ |jobs}} | ||
When using the command, you should see something similar to this: | |||
{{ConsoleLine|first-last@codermerlin:~$ |[1]+ Stopped /usr/local/bin/emacs main.swift}} | {{ConsoleLine|first-last@codermerlin:~$ |[1]+ Stopped /usr/local/bin/emacs main.swift}} <br> | ||
====Opening suspended files==== | |||
Let's reopen the file using the '''fg''' command. | Let's reopen the file using the '''fg''' command. | ||
{{ConsoleLine|first-last@codermerlin:~$ |fg}} | {{ConsoleLine|first-last@codermerlin:~$ |fg}} | ||
And finally, let's first save the file using '''CONTROL-x-s''' and then close the file using '''CONTROL-x-c'''. | And finally, let's first save the file using '''CONTROL-x-CONTROL-s''' and then close the file using '''CONTROL-x-CONTROL-c'''. | ||
For further reference | For further reference about the Emacs commands, continue to the next section. | ||
For more detailed information on this and relating topics: [[W1002 The Client, the Server, and the Shell]] | For more detailed information on this and relating topics: [[W1002 The Client, the Server, and the Shell]] | ||
=== Emacs === | === Emacs === | ||
Emacs is the text editor we will be using to edit our files today. Many of the important key sequences for navigating, suspending/exiting, and saving files will be displayed in the following charts. Keep in mind this list is not comprehensive | Emacs is the text editor we will be using to edit our files today. Many of the important key sequences for navigating, suspending/exiting, and saving files will be displayed in the following charts. Keep in mind this list is not comprehensive but mostly accounts for basic emacs usage. A comprehensive list of Emacs Keys is '''[[Emacs_Keys|here]]'''. Additionally, typing "emacs" into the shell brings up further documentation. | ||
==== Navigation ==== | ==== Navigation ==== | ||
| Line 161: | Line 188: | ||
|} | |} | ||
The arrow keys can be used to traverse across characters. Keep in mind that emacs keys for moving across characters | The '''arrow keys''' can be used to traverse across characters. Keep in mind that using emacs keys for moving across characters is an option as well. | ||
==== Suspend/Exit and Save ==== | ==== Suspend/Exit and Save ==== | ||
| Line 181: | Line 208: | ||
|} | |} | ||
== Graphics | == Graphics == | ||
Now it is time to learn more about some graphics... [[W5020.10_Graphics|Click here!]] | |||
== | ==HTML/CSS== | ||
After you have finished learning about graphics, [[W5020.11_HTML|click here]] to learn how to create your own website! | |||
Latest revision as of 16:41, 9 May 2023
CS ED Week[edit]
If you would like to participate in the event, please sign up by Clicking Here
Future updates will be provided through the Remind class @ahs-csed.
We thank you for your interest in participating!
Introduction[edit]
An Hour of Code and Beyond
"There's more to it than meets the eye"
This article can be improved by: The date and times below are from 2020, but should they be changed to be current?
Wednesday, December 9th, 2020 5PM-7PM
What is CS ED Week about?
“Computer Science Education Week (CSEdWeek) is an annual call to action to inspire K-12 students to learn computer science, advocate for equity in computer science education, and celebrate the contributions of students, teachers, and partners to the field. As part of the #CSforGood movement this year we’re proud to elevate.”
Topics we will go over:
 * What is Computer Science?
 * Linux Basics
 * Shell basics
 * Igis and graphics
 * CSS/HTML Basics
Merlin Shell Access Application:
If you do not have access to the Merlin Shell, use this Link to sign up. You will need this access to the shell to participate in the events today!
Merlin Shell Access Application Link
CS ED Survey: If you already completed the application above, fill this survey so we can see what interests you! Survey Link
Computer Science[edit]
Why Computer Science?[edit]
Computer science is one of the fastest growing pathways in terms of economic viability and accessibility and significance. With the onset of the digital age, many industries have turned toward technology as their ticket to the future, and now, more than ever, need computer scientists in their fields. Just take a look at the world around us. Restaurants and grocery chains such as Walmart or Chili’s rely on mobile applications for deliveries and purchases, while distributors like Amazon continue to thrive in online shopping. Anything your eyes meet is bound to have coding behind its inception. Yet, this flexibility exists within the work environment as well. Unlike other trades or positions, computer science requires no specific job site to get work done. Whether it be from your couch or even your local library, progress can be made, as long as an electrical charge and Internet connection exist. However, while this ease of access can be applied to both contingency and setting, it is mostly absent from the field’s workforce.
Starting a career in computer science is arguably the hardest part; someone needs to make an initial investment for equipment, and they need the courage to dive head-first into uncharted territory. The price floor itself is a considerable first step because it requires a functioning computer plus electrical and network connections. This places those of lower economic standings at a disadvantage because the tools required often don't match a preferable price point. Yet, while cost filters out and blocks access to those interested in the field, social diversity actively works to obstruct those of differing social status as well. The current environment of computer science suffers from a social rigidity: variety in its workers' social heritage is something not commonly seen, and, as a result, intimidates newcomers entering the industry. People typically search for those who are like them, such as in high school clubs or friend groups. Yet, because these values are almost nonexistent, plenty of outsiders are turned away. However, with newcomers like you, we hope that the field can be more accepting and open. Like with any common settler, we need rookies like you to set up camp in the field and carve your own space that can change what was once a frightening turnoff into a warm embrace. They say that metals can attract other metals, and we need you to be those magnets in the field, setting up a segway for the entrance of like-minded individuals.
Fundamental Concepts of Computer Science[edit]
Computer Science, at its core, is the bridge between computers and humans, allowing us to “talk” to machines and tell them what to do. Coding languages are used to translate normal words into computer language. For example, 2 is a number and is represented through a variable that can store numbers and has a label to clarify exactly what information it stores. Coding languages have a few basic data types used to store common real world values:
- Booleans represent whether something is true or false
- Integers represent positive and negative whole numbers
- Doubles represent positive and negative decimals
- Characters represent 'letters,' except they also include numbers, symbols, and other written characters, as long as they are only 1 unit long.
This means 'a' is a single character and 'an' is made up of two characters. - Strings represent words, or several characters put together.
These are the five basic variable types used in coding. However, if you wanted to store the information of something more complicated than just a number or a word, like an animal, you would use a class. A class is a way to group together lots of smaller variables as parts of a larger object. For example, animals have legs, ages, colors, sizes, names, and other information that can be stored using any of the five basic data types. A class allows you to compile these values together under one name, in this case Animal, and also name its parts, like legs, color, weight, and species. Classes also have the ability to use functions, which are the actions a class can perform, such as an Animal being able to eat, walk, sleep, or hunt.
Effects of Computer Science?[edit]
Computer science goes beyond coding—it is a unique outlet that encourages creative expression and allows students to be free from the constraints of a typical classroom. Computer science also serves as a platform for students to be ambitious in their pursuits and broaden their knowledge in an engaging manner, but the effect of the field goes far beyond its mentally stimulating nature.
Socially, programming and computer science have opened up an avenue to help empower underprivileged communities and break the cycle of poverty. The introduction of innovations—such as algorithms that better organize resource allocation, technology that helps connect communities to make existing resources more available, and artificial intelligence that can efficiently pinpoint areas that are most in need—has allowed for great strides in alleviating the effects of poverty in many communities.
These innovations along with the increased capacity to increase awareness of these issues across the nation has led to increased donations and greater funding for educational programs that prepare students for success going forward. Through these improved programs, students have been met with more promising opportunities to expand on their programming skills and put themselves in positions to successfully break the cycle of poverty.
On a larger scale, increased access to computer science is allowing for a mostly white & male dominated field to become more diverse and inclusive. With the expansion of curriculum to more regularly include computer science education, representation of ethnic, gender, and other minority groups has begun to trend upwards. In turn, this has led to greater representation in the workplace. These developments have had positive social effects because as high-paying and influential jobs diversify, opportunities become more available for all people regardless of their background and groups that are often overlooked can feel more empowered to pursue computer science as a career.
In the end, although computer science is a field that is progressing everyday, it is still wide open for different possibilities and changes. Although great progress has been made, there is still work to be done to ensure that computer science is a field that is inclusive to absolutely everyone, regardless of their background.
Linux Basics[edit]
Getting Ready[edit]
Installing the secure shell extension[edit]
To access Merlin, you'll need a secure shell client.
A shell allows a user to interact on one computer, and the client allows you to create a shell on another computer.
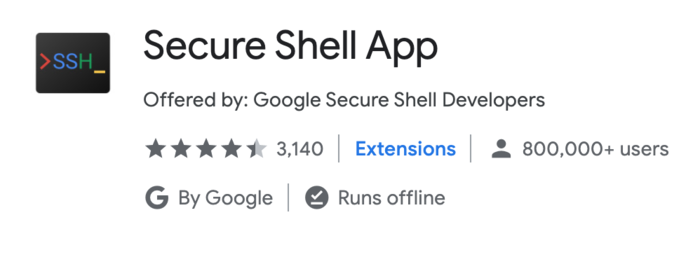
If you're using a Windows-based device (usable on any device with Chrome): install Google Chrome, open up Chrome and search "Secure Shell Extension", install the extension.
If you're using a Mac or Linux based device, it probably has a built-in client that can be accessed from the terminal. You can also use telnet. (A MacOS Intel-compliled client is available here or download the source from here.)
You will need a connection string to access the server.
Obtaining an account[edit]
Fill out this form (if you haven't already) and wait for your credentials to be provided (via email).
Once your account is obtained, open up the "Connection Dialogue" and input the connection string. It prompts you for your password. Input it and continue.
It prompts you to reset your password. You can do this by typing "passwd" into the terminal:
 Helpful Hint
(here for further information)
Change your default password to a strong password:
john-williams@codermerlin:~$ passwd
Changing password for john-williams.
(current) UNIX password:
Enter new UNIX password:
Retype new UNIX password:
passwd: password updated successfully
[edit]
In the shell, everything can be done with the keyboard. The shell works on a command response system where you type a command, and the program provides a response. The shell works with directories that are similar to folders on a typical computer, and when you run a command, it runs on the current working directory.
View the working directory[edit]
To see what our working directory is inside the shell, we are going to use pwd which stands for "print the working directory." You can use the command by typing it in and pressing <RETURN>.
first-last@codermerlin:~$ pwd
/home/first-last
After using the command, you should see something like the above console line. As long as you haven't moved in the directory, you should start off in the home directory.
Listing directories and files[edit]
Next, let's try the ls command, which list, the directories and files in the working directory. However, no files or directories have been created yet, so there won't be anything to display.
first-last@codermerlin:~$ ls
Making a directory[edit]
We can make a directory by using the command mkdir.
first-last@codermerlin:~$ mkdir firstDirectory
Then to enter the directory, simply use the command "cd <SPACE> directoryName".
first-last@codermerlin:~$ cd firstDirectory
And if we use the pwd command now, we should see that we are in the created directory.
first-last@codermerlin:~$ pwd
/home/first-last/firstDirectory
Changing directories[edit]
Now let's navigate out of the current directory. Using the previous cd command, we can use "../" to go back one directory (which can be chained together, e.g. "../../../"), leave it blank to return to the home directory or use "~" to also get to the home directory.
first-last@codermerlin:~$ cd ../
Now that we have returned to the home directory, let's try listing again:
first-last@codermerlin:~$ ls
You should now see the directory previously added.
firstDirectory
Creating a file[edit]
We can create a file using the emacs command followed by the file name and extension. In this case, we are using the Swift coding language so the extension is ".swift". This creates and opens the file, which will initially be blank, but if the file already exists, this command can be used to open and edit it.
first-last@codermerlin:~$ emacs main.swift
Once we have a file open, we can begin using emacs shortcuts to navigate and edit the file. However, for now, let's suspend the file using CONTROL-z (press your control key, followed by the 'z' key).
View running files[edit]
Now we are back in the shell, but we still have a file that is open, but suspended. Using the command jobs, we can see all of our open files.
first-last@codermerlin:~$ jobs
When using the command, you should see something similar to this:
first-last@codermerlin:~$ [1]+ Stopped /usr/local/bin/emacs main.swift
Opening suspended files[edit]
Let's reopen the file using the fg command.
first-last@codermerlin:~$ fg
And finally, let's first save the file using CONTROL-x-CONTROL-s and then close the file using CONTROL-x-CONTROL-c. For further reference about the Emacs commands, continue to the next section.
For more detailed information on this and relating topics: W1002 The Client, the Server, and the Shell
Emacs[edit]
Emacs is the text editor we will be using to edit our files today. Many of the important key sequences for navigating, suspending/exiting, and saving files will be displayed in the following charts. Keep in mind this list is not comprehensive but mostly accounts for basic emacs usage. A comprehensive list of Emacs Keys is here. Additionally, typing "emacs" into the shell brings up further documentation.
[edit]
| Key Sequence | Purpose |
|---|---|
| CONTROL-v | Scroll down (forwards) one page |
| ALT-v | Scroll up (backwards) one page |
| CONTROL-l (second character is lowercase 'L') | Clear screen and redisplay the text, moving the cursor to the vertical center |
| ALT-SHIFT-< | Move the cursor to the beginning of the file |
| ALT-SHIFT-> | Move the cursor to the end of the file |
The arrow keys can be used to traverse across characters. Keep in mind that using emacs keys for moving across characters is an option as well.
Suspend/Exit and Save[edit]
| Key Sequence | Purpose |
|---|---|
| CONTROL-x CONTROL-c | Exit emacs |
| CONTROL-z | Suspend emacs temporarily |
| CONTROL-x CONTROL-s | Save the current file |
| CONTROL-x s | Save changed files (prompts for all confirmation) |
Graphics[edit]
Now it is time to learn more about some graphics... Click here!
HTML/CSS[edit]
After you have finished learning about graphics, click here to learn how to create your own website!
