Difference between revisions of "W1521 Moving Along"
Jeff-strong (talk | contribs) m (Editorial review and minor corrections) |
|||
| (34 intermediate revisions by 2 users not shown) | |||
| Line 1: | Line 1: | ||
[[File:Animhorse.gif|thumb|Animated Horse]] | [[File:Animhorse.gif|thumb|Animated Horse]] | ||
== Prerequisites == | == Prerequisites == | ||
* [[ | * [[W1505 Images]] | ||
== Research == | == Research == | ||
* [https://en.wikipedia.org/wiki/Event_(computing) Events] | |||
== Background == | == Background == | ||
An '''event''' is an asynchronous occurrence to which our software can react by implementing an '''event handler'''. Events are often triggered by either the user (e.g., moving the mouse or pressing a key) or by the system (e.g., timers, screen refresh). Handling user-generated events in this manner enables our system to be more ''responsive'', because our program can react to the event as it occurs. An alternative method involved '''polling''', in which we periodically check to see if the state of a system has changed. For example, we can periodically check to see if a key has been pressed on the keyboard. Generally, polling leads to a less than ideal experience for the user. We might, for example, miss a keypress because we were busy doing something else, or we might respond much more slowly and not meet the user's expectations. In this lab, we'll be using the '''render''' event handler to refresh the objects drawn on the canvas and the '''onEntityMouseClick''' event to respond to a mouse click. The '''render''' event handler is invoked by the system periodically to refresh the canvas, while the '''onEntityMouseClick''' event is generated as a result of the user clicking the mouse. | |||
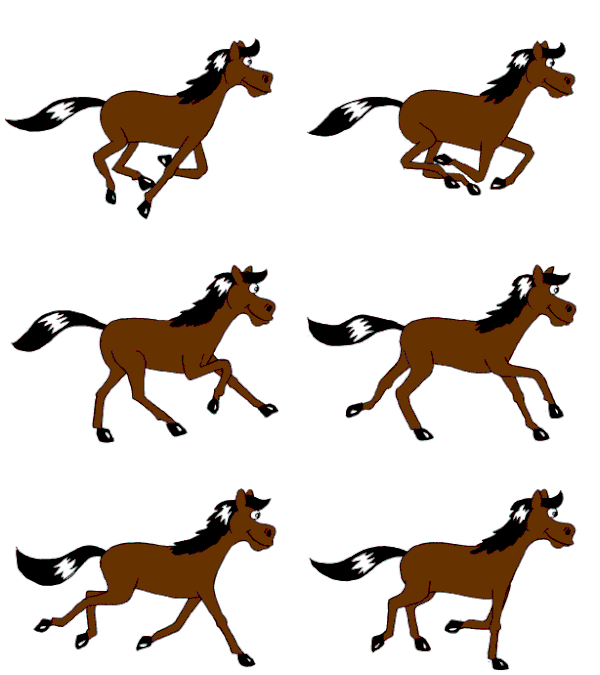
Using the tools that we've learned to date, we're able to produce many types of still images. In this lab, we'll focus on defining objects that persist throughout our Scenes session, enabling us to modify the properties of these objects to create simple animations. | |||
== Prepare == | |||
{{ScenesShellPrepare|W1521}} | |||
== Experiment == | == Experiment == | ||
=== First Steps === | |||
{{Hint| | |||
* Remember to execute '''dylibEmacs''' to generate the files required by emacs to access dynamic libraries | |||
* Remember to import any required libraries at the top of your file | |||
* When creating a new file, emacs might not yet recognize the associated libraries. Simply exit emacs and re-enter the file. | |||
}} | |||
Let's start by creating a ball. Create a new file {{Pathname|Ball.swift}} in emacs. Begin by defining the following properties on a new {{SwiftClass|Ball}} class: | |||
<syntaxhighlight lang="swift"> | |||
class Ball: RenderableEntity { | |||
let ellipse = Ellipse(center:Point(x:0, y:0), radiusX:30, radiusY:30, fillMode:.fillAndStroke) | |||
let strokeStyle = StrokeStyle(color:Color(.orange)) | |||
let fillStyle = FillStyle(color:Color(.red)) | |||
let lineWidth = LineWidth(width:5) | |||
} | |||
</syntaxhighlight> | |||
This defines a new class with properties defining the visual aspects required to render a ball. | |||
== | We'll need to initialize the ball in our {{SwiftIdentifier|init}} constructor. Create the constructor as follows: | ||
<syntaxhighlight lang="swift" highlight="2"> | |||
init() { | |||
// Using a meaningful name can be helpful for debugging | |||
super.init(name:"Ball") | |||
} | |||
</syntaxhighlight> | |||
The {{SwiftIdentifier|setup}} method is invoked once, when our canvas is first set up. We'll use this opportunity to set the initial position of the ellipse. Create a new method, {{SwiftIdentifier|setup}}, as follows: | |||
<syntaxhighlight lang="swift"> | |||
override func setup(canvasSize: Size, canvas: Canvas) { | |||
// Position the ellipse at the center of the canvas | |||
ellipse.center = canvasSize.center | |||
} | |||
</syntaxhighlight> | |||
Finally, we'll need to render the ball when requested. We'll do that in the {{SwiftIdentifier|render}} method. The {{SwiftIdentifier|render}} method is invoked frequently for as long as our application is running. Add a {{SwiftIdentifier|render}} method as follows: | |||
<syntaxhighlight lang=" | |||
<syntaxhighlight lang="swift"> | |||
override func render(canvas:Canvas) { | |||
canvas.render(strokeStyle, fillStyle, lineWidth, ellipse) | |||
} | |||
</syntaxhighlight> | </syntaxhighlight> | ||
At this point, we've created a {{SwiftClass|Ball}} class but we haven't '''instantiated''' an instance of it. For it to participate in our {{SwiftClass|Scene}} we'll need to add it to a {{SwiftClass|Layer}}. Because we'll later be interacting with the ball, let's add it to our {{SwiftClass|InteractionLayer}}. Edit the code in {{Pathname|InteractionLayer.swift}} as follows: | |||
swift | |||
<syntaxhighlight lang="swift" highlight="8"> | |||
class InteractionLayer : Layer { | |||
<syntaxhighlight lang=" | |||
let ball = Ball() | |||
init() { | |||
// Using a meaningful name can be helpful for debugging | |||
super.init(name:"Interaction") | |||
// We insert our RenderableEntities in the constructor | |||
insert(entity: ball, at: .front) | |||
} | |||
} | |||
</syntaxhighlight> | |||
{{RunProgram|Run the program and view in a browser before continuing. Be sure that you understand the role of each method.}} | |||
{{ | === Mouse Click Events === | ||
{{Hint|You might want to review [[W1513 Patterns of Patterns]] to refresh your memory on event handling.}} | |||
Continue editing {{Pathname|Ball.swift}}: | |||
==== Declare Conformance to Protocol ==== | |||
<syntaxhighlight lang="swift"> | <syntaxhighlight lang="swift" highlight="1"> | ||
class Ball : RenderableEntity, EntityMouseClickHandler { | |||
... | |||
} | |||
</syntaxhighlight> | </syntaxhighlight> | ||
==== Notify Dispatcher ==== | |||
<syntaxhighlight lang="swift"> | <syntaxhighlight lang="swift" highlight="3,6-8"> | ||
override func setup(canvasSize:Size, canvas:Canvas) { | |||
// ... other code is here ... | |||
dispatcher.registerEntityMouseClickHandler(handler:self) | |||
} | } | ||
override func teardown() { | |||
dispatcher.unregisterEntityMouseClickHandler(handler:self) | |||
override func | |||
} | } | ||
</syntaxhighlight> | </syntaxhighlight> | ||
==== Implement Event Handler ==== | |||
Let's add another method, {{SwiftIdentifier| onEntityMouseClick}}, which is invoked when the mouse button is clicked. The method provides the location on the canvas at the position that the mouse was clicked. We can use the location to move the ball from its original, center position to the location that the mouse was clicked. | |||
<syntaxhighlight lang="swift"> | <syntaxhighlight lang="swift"> | ||
func onEntityMouseClick(globalLocation: Point) { | |||
ellipse.center = globalLocation | |||
} | } | ||
</syntaxhighlight> | </syntaxhighlight> | ||
Note the manner in which we took advantage of objects by assigning an instance of {{SwiftClass|Point}} directly to the ball's center, which is also a property of type {{SwiftClass|Point}}. | |||
==== Define the BoundingRect ==== | |||
We want to respond from anywhere on the canvas, so we'll use the largest Rect possible: | |||
<syntaxhighlight lang="swift"> | <syntaxhighlight lang="swift"> | ||
override func | override func boundingRect() -> Rect { | ||
return Rect(size: Size(width: Int.max, height: Int.max)) | |||
} | } | ||
</syntaxhighlight> | </syntaxhighlight> | ||
{{RunProgram|Run the program and view in a browser before continuing. <br/> Click the mouse in several different locations. Did the ball '''move''' to the new location? If not, what happened? Why?}} | |||
== Exercises == | == Exercises == | ||
{{W1521-Exercises}} | |||
* {{MMMAssignment|M1521-28}} | |||
== Key Concepts == | == Key Concepts == | ||
{{KeyConcepts| | |||
* An '''event''' is an asynchronous occurrence to which our software can react by implementing an '''event handler''' | |||
** Events can be triggered by the system | |||
*** Timers | |||
*** Screen refresh | |||
** Events can be triggered by a user | |||
*** Mouse movement | |||
*** Mouse clicks | |||
*** Keypresses | |||
* '''Flags''' are Boolean values that indicate the state of a binary situation | |||
** '''clearing''' a flag means setting it to false | |||
** '''setting''' a flag means setting it to true | |||
}} | |||
[[Category:IGIS]] | |||
Latest revision as of 14:37, 7 May 2022
Prerequisites[edit]
Research[edit]
Background[edit]
An event is an asynchronous occurrence to which our software can react by implementing an event handler. Events are often triggered by either the user (e.g., moving the mouse or pressing a key) or by the system (e.g., timers, screen refresh). Handling user-generated events in this manner enables our system to be more responsive, because our program can react to the event as it occurs. An alternative method involved polling, in which we periodically check to see if the state of a system has changed. For example, we can periodically check to see if a key has been pressed on the keyboard. Generally, polling leads to a less than ideal experience for the user. We might, for example, miss a keypress because we were busy doing something else, or we might respond much more slowly and not meet the user's expectations. In this lab, we'll be using the render event handler to refresh the objects drawn on the canvas and the onEntityMouseClick event to respond to a mouse click. The render event handler is invoked by the system periodically to refresh the canvas, while the onEntityMouseClick event is generated as a result of the user clicking the mouse.
Using the tools that we've learned to date, we're able to produce many types of still images. In this lab, we'll focus on defining objects that persist throughout our Scenes session, enabling us to modify the properties of these objects to create simple animations.
Prepare[edit]
Create a new Scenes shell project within your Experiences directory:
ty-cam@codermerlin:~$ cd ~/Experiences
ty-cam@codermerlin:~/Experiences$ git clone https://github.com/TheCoderMerlin/ScenesShellBasic W1521
Enter the Sources/ScenesShell directory of the new project:
ty-cam@codermerlin:~/Experiences$ cd W1521/Sources/ScenesShell/
 |
Run the program.
ty-cam@codermerlin:~/Experiences/W1521/Sources/ScenesShell$ run |
Ensure that you are logged on to the wiki. Then, click on the Tools menu followed by right-clicking on IGIS and selecting the menu item Open in New Window or Open in New Tab.
You'll know you're successful if you see the title bar change to "Coder Merlin: IGIS". (The browser window will be blank because we haven't added any graphics yet.)
 Helpful Hint
Experiment[edit]
First Steps[edit]
 Helpful Hint
- Remember to execute dylibEmacs to generate the files required by emacs to access dynamic libraries
- Remember to import any required libraries at the top of your file
- When creating a new file, emacs might not yet recognize the associated libraries. Simply exit emacs and re-enter the file.
Let's start by creating a ball. Create a new file Ball.swift in emacs. Begin by defining the following properties on a new Ball class:
class Ball: RenderableEntity {
    let ellipse = Ellipse(center:Point(x:0, y:0), radiusX:30, radiusY:30, fillMode:.fillAndStroke)
    let strokeStyle = StrokeStyle(color:Color(.orange))
    let fillStyle = FillStyle(color:Color(.red))
    let lineWidth = LineWidth(width:5)
}
This defines a new class with properties defining the visual aspects required to render a ball.
We'll need to initialize the ball in our init constructor. Create the constructor as follows:
    init() {
        // Using a meaningful name can be helpful for debugging
        super.init(name:"Ball")
    }
The setup method is invoked once, when our canvas is first set up. We'll use this opportunity to set the initial position of the ellipse. Create a new method, setup, as follows:
    override func setup(canvasSize: Size, canvas: Canvas) {
        // Position the ellipse at the center of the canvas
        ellipse.center = canvasSize.center
    }
Finally, we'll need to render the ball when requested. We'll do that in the render method. The render method is invoked frequently for as long as our application is running. Add a render method as follows:
    override func render(canvas:Canvas) {
        canvas.render(strokeStyle, fillStyle, lineWidth, ellipse)
    }
At this point, we've created a Ball class but we haven't instantiated an instance of it. For it to participate in our Scene we'll need to add it to a Layer. Because we'll later be interacting with the ball, let's add it to our InteractionLayer. Edit the code in InteractionLayer.swift as follows:
class InteractionLayer : Layer {

    let ball = Ball()

    init() {
        // Using a meaningful name can be helpful for debugging
        super.init(name:"Interaction")

        // We insert our RenderableEntities in the constructor
        insert(entity: ball, at: .front)
     }
 }
 |
Run the program and view in a browser before continuing. Be sure that you understand the role of each method. |
Mouse Click Events[edit]
 Helpful Hint
Continue editing Ball.swift:
Declare Conformance to Protocol[edit]
class Ball : RenderableEntity, EntityMouseClickHandler {
   ...
}
Notify Dispatcher[edit]
    override func setup(canvasSize:Size, canvas:Canvas) {
        // ... other code is here ...
        dispatcher.registerEntityMouseClickHandler(handler:self)
    }

    override func teardown() {
        dispatcher.unregisterEntityMouseClickHandler(handler:self)
    }
Implement Event Handler[edit]
Let's add another method, onEntityMouseClick, which is invoked when the mouse button is clicked. The method provides the location on the canvas at the position that the mouse was clicked. We can use the location to move the ball from its original, center position to the location that the mouse was clicked.
    func onEntityMouseClick(globalLocation: Point) {
        ellipse.center = globalLocation
    }
Note the manner in which we took advantage of objects by assigning an instance of Point directly to the ball's center, which is also a property of type Point.
Define the BoundingRect[edit]
We want to respond from anywhere on the canvas, so we'll use the largest Rect possible:
    override func boundingRect() -> Rect {
        return Rect(size: Size(width: Int.max, height: Int.max))
    }
 |
Run the program and view in a browser before continuing. Click the mouse in several different locations. Did the ball move to the new location? If not, what happened? Why? |
Exercises[edit]
- Alter the Background so that the screen is cleared during each render cycle. Then click on the canvas again and demonstrate that the ball appears to move as the mouse is clicked.
- Alter the Background so that the top half of the screen appears to be a sky of blue and the bottom half appears to be grass of green
- Add at least three additional outdoor shapes to the Background using at least three additional colors. This is your creation, so feel free to use your imagination rather than going for the straight-forward sun, clouds, and trees.
- Alter the Ball so that rather than responding to onEntityMouseClick events, it responds to onMouseMove events. To do so, conform to protocol MouseMoveHandler, and register and unregister with the dispatcher (registerMouseMoveHandler, unregisterMouseMoveHandler). The signature for onMouseMove is:
func onMouseMove(globalLocation: Point, movement: Point)
- M1521-28 Complete Merlin Mission Manager Mission M1521-28.
Key Concepts[edit]
- An event is an asynchronous occurrence to which our software can react by implementing an event handler
- Events can be triggered by the system
- Timers
- Screen refresh
- Events can be triggered by a user
- Mouse movement
- Mouse clicks
- Keypresses
- Events can be triggered by the system
- Flags are Boolean values that indicate the state of a binary situation
- clearing a flag means setting it to false
- setting a flag means setting it to true

