Tabby
What is it?[edit]
Tabby is "...a terminal for the modern age." You can read more about what Tabby is and isn't on the Tabby home page. The vast majority of what you'll be doing on Coder Merlin™ involves using a shell that you access through a terminal such as Tabby.
General Configuration[edit]
Tabby requires several steps to configure it. Most of these steps need to be performed only once because Tabby stores the configuration remotely (in the Cloud). It's very important to follow the instructions carefully.
GitHub, GitLab, or Google Account Required[edit]
Make sure that you have a GitHub, GitLab, or Google account configured. This is required to log in to Tabby.
Access[edit]
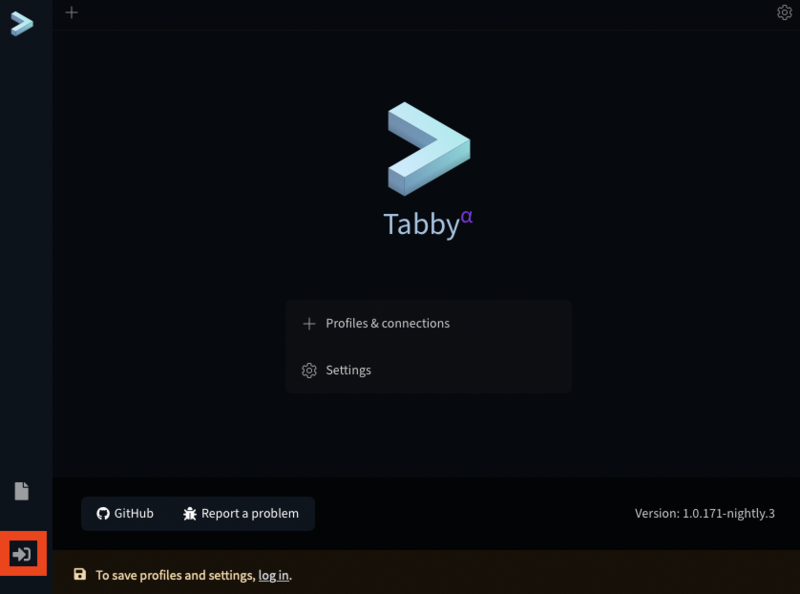
Login[edit]
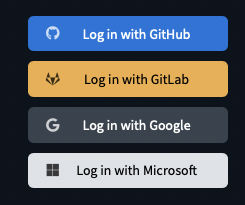
Select an Authentication Provider[edit]
Click ONE of the following buttons:
- Log in with GitHub
- Log in with GitLab
- Log in with Google
- (The Microsoft option is not supported)
Log in to Tabby[edit]
Follow the login flow for your selected provider. After successfully logging in, you'll be returned to the Tabby home page.
Set Up Config Sync and Connection Gateway[edit]
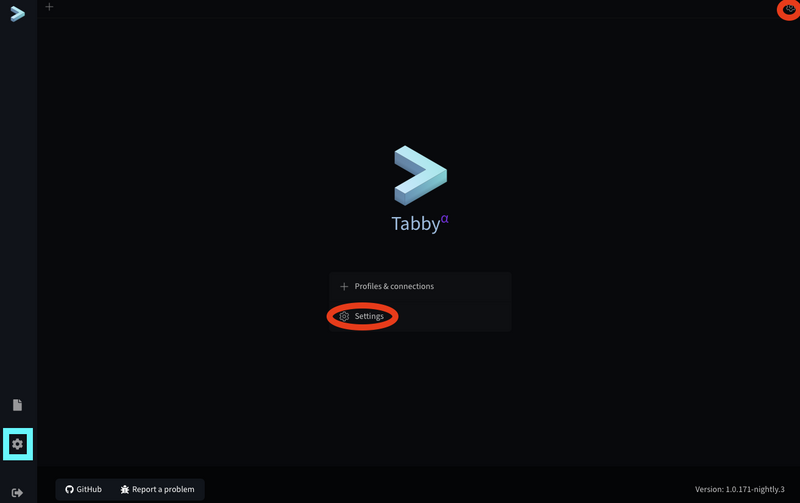
Two configuration buttons (⚙) can be used. They are both called Settings. In the below image, the red ovals indicate the button used primarily for application customizations. The cyan rectangle indicates the button used for configuring synchronization and the connection gateway. Click the Settings button indicated in the cyan rectangle.
Connection Gateway[edit]
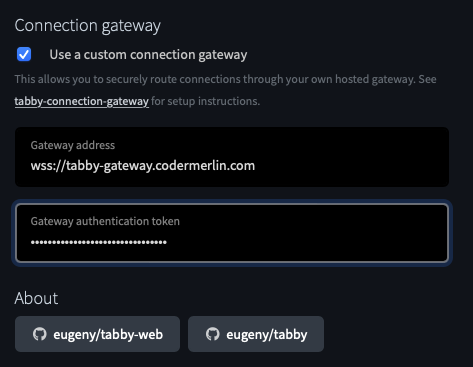
Make sure that the checkbox for Use a custom connection gateway is selected. For the Gateway address, enter:
wss://tabby-gateway.codermerlin.com
For the Gateway authentication token, enter:
1cSaxV0BMABkjAEsV6lFdRK8gkbl0DDc
Config Sync[edit]
In the same dialog, use the copy icon to copy the sync token.
Click the Apply button.
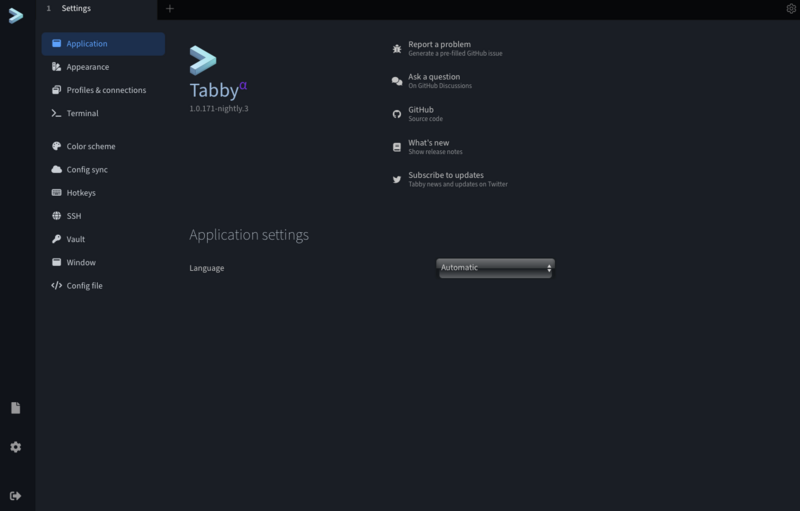
At the top-right corner of the window, click the Configuration button. The Application settings page opens.
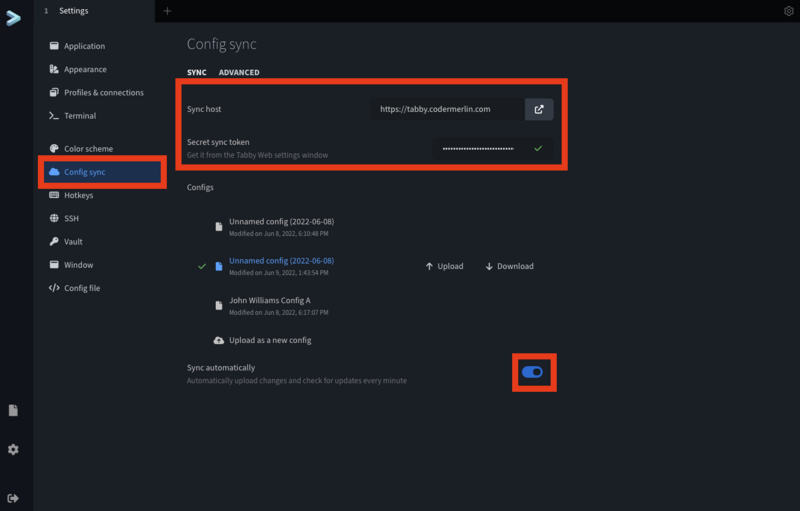
On the left-hand side, click the Config sync tab.
For the Sync host, enter:
https://tabby.codermerlin.com
Click in the "Secret sync token" password field and paste the token that you copied previously. Click "↓ Download" to download a configuration. Then, turn on Sync automatically.
Sample Configuration File[edit]
In most cases, you can simply replace the existing configuration file with the contents of this link and skip the remaining steps: Tabby.csv
Connection Configuration[edit]
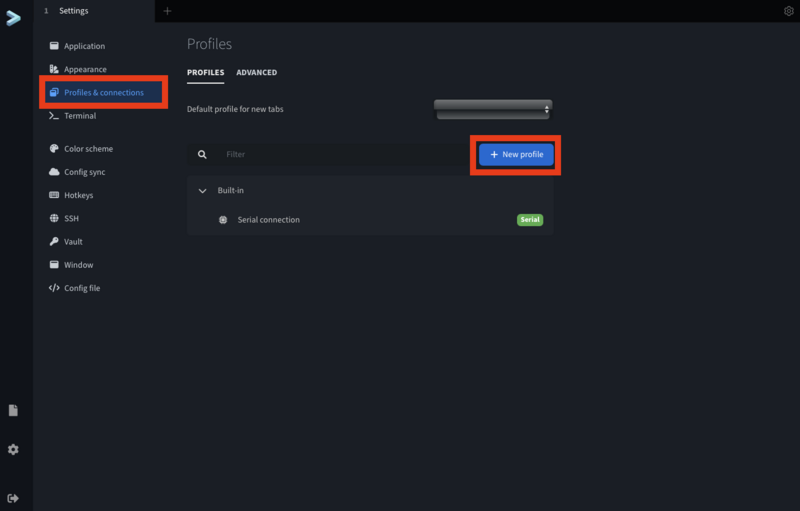
On the left-hand side, click the Profiles & connections tab. The Profiles page opens. Click the + New profile button.
Click the SSH connection option.
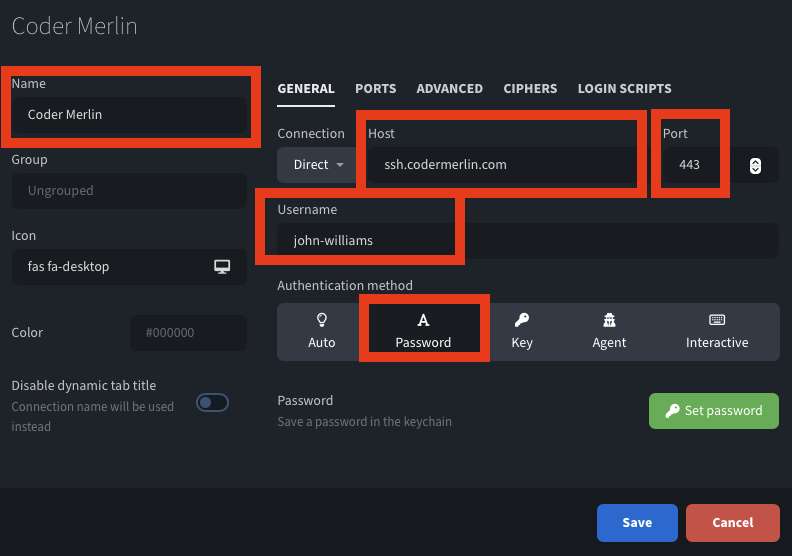
The connection configuration page for SSH opens. For the connection name, use:
Coder Merlin
For the host, enter:
ssh.codermerlin.academy
For the port, enter:
22
For the user name, enter your Coder Merlin user name. Finally, be sure to click Password for Authentication method. Verify your entries, then click the Save button. Then, close the Settings tab.
Connecting[edit]
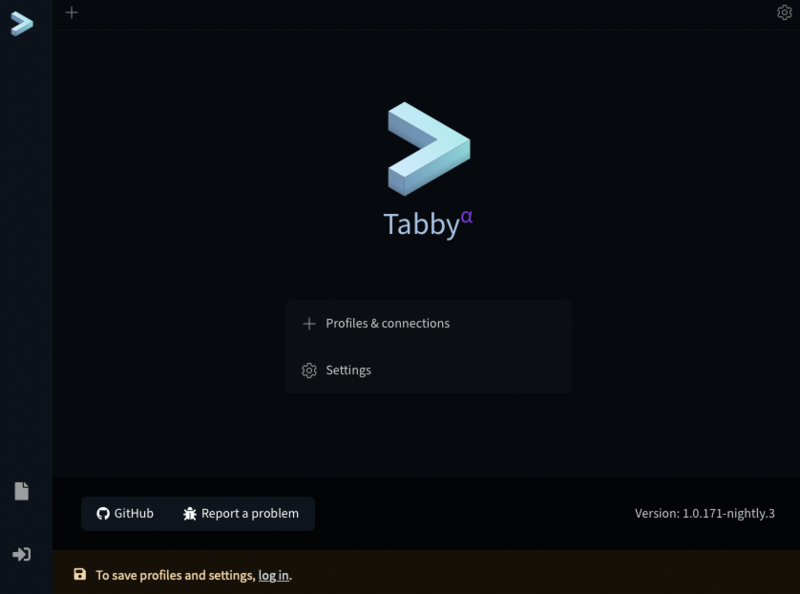
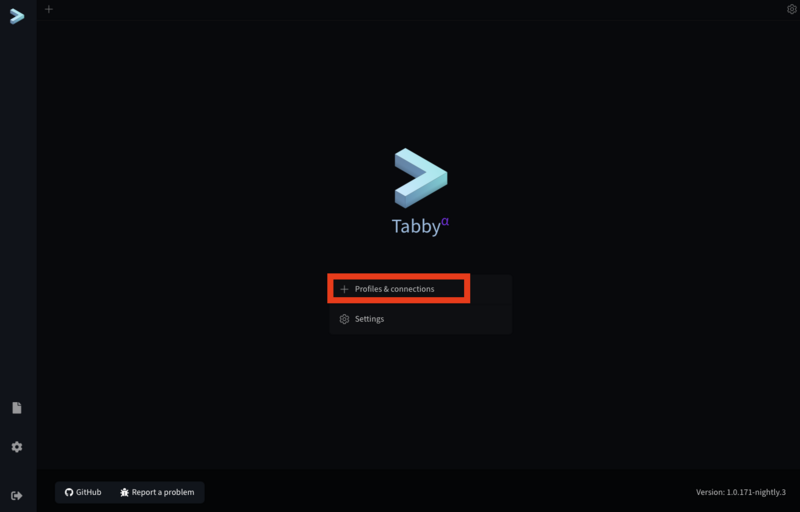
From the Tabby home page, click + Profiles & connections.
In the dropdown that appears, click Coder Merlin. The client should connect, and then you'll be prompted to enter your password.
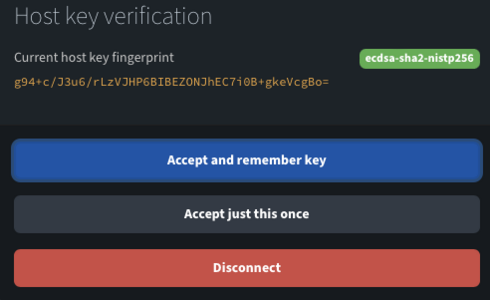
If you see a page asking you to verify the host key, make sure you see this fingerprint:
g94+c/J3u6/rLzVJHP6BIBEZONJhEC7i0B+gkeVcgBo
You may then safely click Accept and remember key.

